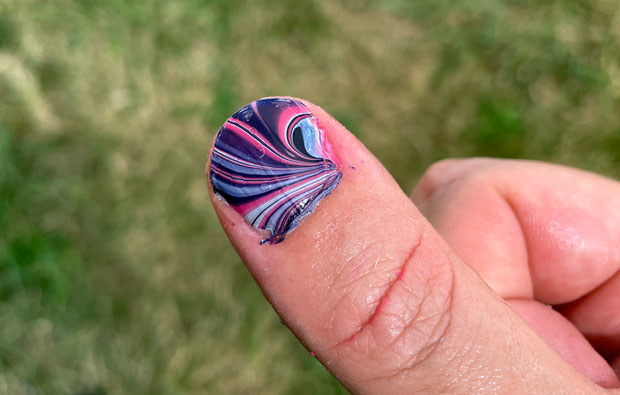
Make your nails beautiful with this fun activity
Have fun and give yourself marbled nails while learning more about chemistry.
![]() Safety: This activity uses nail polish remover. Ask an adult to help.
Safety: This activity uses nail polish remover. Ask an adult to help.
You will need
- Scrap paper such as newspaper
- Old clothes
- Disposable cup
- Water
- Vaseline
- Wooden skewer
- Tissues
- Several different colours of nail polish (new nail polish is easier to use than old nail polish)
- Nail polish remover
What to do
 Put on some old clothes and lay some scrap paper down on the table.
 Fill the cup with water.
 Put Vaseline on one of your thumbs, trying to cover all of the skin. Don’t put any Vaseline on your thumbnail.
 Loosen the lids of all of your bottles of nail polish so you can get to them easily.
 Take one colour of nail polish and drip a drop of polish into the centre of the cup of water. The polish should spread out on the surface of the water. If the polish sinks to the bottom of the cup, try again, but drip the polish from a lower height.
 Take another colour and drip it in the centre of the cup. Keep dripping different colours into the centre of the cup until you have about ten rings of colour.
 Run your skewer through the rings to mix them slightly. Running from the middle to the edge is easier because the outer rings might have dried a bit.
 Once you are happy with your swirls, stick your Vaseline-covered thumb into the cup, nail down.
 Keep your thumb in the cup while you move the remaining polish out of the way with the skewer.
 Pull your thumb out of the cup carefully. Let it dry for a bit and then wipe the polish off your skin with a tissue.
- If you’d like to colour more of your nails, repeat steps 2 to 10 with a different finger each time.
- When you’re ready to remove the polish from your nails, ask an adult to help rub it off with nail polish remover.
What’s happening?
Water and nail polish don’t mix together very well. Water sticks to water, and nail polish sticks to nail polish. Nail polish is also less dense than water – one litre of nail polish weighs less than one litre of water. This is why nail polish floats on water.
Nail polish is made of a hard substance called varnish. To make the varnish liquid, it’s dissolved in a solvent, and dyes are added to give it colour. When you put nail polish on your nails, the solvent slowly evaporates, leaving behind a solid, colourful coating.
The solvent starts to evaporate as soon as you put the nail polish onto the water. If you work too slowly, the polish might dry out and solidify before you are ready to put it on your nail.
If you’re after more science activities for kids, subscribe to Double Helix magazine!

